10.31.2012

DIY: Nailhead Trim Headboard

The fun productions have continued and this time it's an addition to the master bedroom! We have a platform bed with drawers on the side... in our previous house we needed lots of storage so this was a great bed, plus it was a good deal! Now, I feel like it's a bed we have grown out of and since I wasn't ready to commit to a whole new bed I wanted to a headboard to dress it up. There are a ton of options out there, I fell in love with this one from West Elm... buuuuut I didn't fall in love with the price! Yikes. $500 for a headboard. Well, luckily there are other, DIY options.

And a DIY headboard looks just as nice with a great feeling of accomplishment. :)


So here's the list of supplies and how we did it.

Supplies:
- 3/4" Plywood (I believe that it was an 8' x 4' piece which is plenty big for a king headboard)
- High Loft Batting - high loft is thicker and stiffer whereas low loft is softer and more flimsy for molding to different projects. High loft is good for this project. I bought it big enough to fold it so it was doubled and created a cushier look!
- Nailhead trim kit... I used the cheater method and you should too if you want to do this project!
- Fabric
- A couple screws to use to hang the headboard
- Heavy Duty Stapler - I used an electric one though you can use a manual, hand stapler it is just more difficult!

Step 1: Preparation
First step is to measure.... Measure from one end of the bed to the other so that you get a perfect fit. Once you have the measurements, let's say it's 72" wide, then you cut the plywood the exact length and then the height you want. We cut the height to be in line with the size the batting was but allowed an extra 3 inches on all sides so we could wrap the plywood. Next I cut the fabric to also be about 3" bigger on all sides... meaning 6" taller an wider than the plywood.


Step 2: Stapling :)
First lay the fabric the good side down. Next lay the batting on top of the fabric. Then lay the plywood down on the top. My husband helped with the stapling and I would recommend a partner because he would pull it tight and I would staple. We make a good team. :) We stapled a lot to make sure it was on there good... about every 2".

 
Step 3: Nailhead Trim
Since I was using the nailhead trim kit this part was a breeze and didn't take very long - two very good reasons to use the cheater method instead of nailing a ton of nails individually. The kit works well because it is a strip of nailheads without the actual nails and about every 5-6 there is a hole where you insert a nail to hold it in place. So you only have to nail a fifth of the actual nails for the project. Easy! And you can't tell!


Step 4: Hang the Headboard
Using the scrap plywood my husband cut a long strip in half and then cut the meeting edges at 45 degrees. This allows a ledge for the headboad to hang on. He screwed the top piece to the headboard (45 degree angled in) and then used a stud finder to screw the bottom piece (45 degree angled out) to the wall. After that we simply hung the headboard on the mounted piece of plywood and centered it on the bed! Whew... that was easy and cheap! :)


And what a difference a headboard makes!

 
Here's the budget breakdown:
- Plywood: $25
- Fabric: Remnant for $5... yes... a steal!
- Batting: $15 because I used a 50% off coupon at the craft store!
- Nailhead Trim Kit: $12 because I used a 40% off coupon at another craft store... love coupons!
- Stapler.... borrowed it from the in-laws
TOTAL: $57 for a king size nailheadtrim headboard!


Are you interested in upgrading your bed with a new headboard? Any ideas on how to do it differently? I would love to hear your ideas!

Thanks for stopping by!! Happy Halloween. :)

<- Kassy ->

10.16.2012

DIY: Newborn Pictures

Hello!

It's been awhile since my last post... After a brief sabbatical to welcome my baby boy, Mason, I am finally getting back to blogging and projects! And since I am loving being a new mom I thought my first blog post back should be about my little bundle of joy.

When I was pregnant I started noticing the cutest newborn pictures on Pinterest and Facebook so I checked out local photographers. Holy Moly! They charge a lot... Maybe I'm just cheap (well that's definitely true) but I couldn't believe how much this cost. Most photographers charged $150-250 for the session and then some had minimum print orders of $300-500 and if you just simply wanted the CD of prints then bet on around $600. Yikes! For pictures that my son will likely not care about, ever... I figured that was pretty steep. The pictures are mostly just for me, to share his cuteness with family and friends. So I decided to DIY it and from one amateur to another here are some tips that helped or could have helped me make my newborn pictures successful!

Tip #1: Patience

Duh, right? haha.... I'm sure any parent will say that patience is needed in dealing with any child but it's definitely important for taking newborn pictures. I set aside a whole day for these pictures and I'm glad I did because it took nearly the whole day! After preparing Mason (nursing, changing his diaper, rocking him to sleep) as soon as we started setting him up (removing his onesie and diaper) he peed on my sister (Tip #2) and then again when we set him in his crib to clean up the first pee mess. :) We didn't wait long enough to let him fall into a deeper sleep and that's where a lot of patience comes in. We were too excited to start snapping!

Tip #2: Recruit a Side Kick

My sister was going to be in town the weekend after Mason's birth so I figured she would be a good person to help with the pictures. For ease you should try to shoot the baby within the first 10 days. Babies are calmer, sleep more, and they curl up during that time which makes it easier to "mold" them for the pictures. I could have recruited Seth to be my side kick but he lacked patience which, from tip #1, we know is necessary. After the first pee episode Seth suggested we just call it a day... hadn't even snapped a single shot yet. Good thing I'm stubborn! :)

So why is a side kick important? Well, while you are snapping pictures someone has to spot the baby! They are fragile and at any moment they can move so you want to be sure they are safe. Plus my sister was able to move and change sets/props while I settled him down and kept him calm. 

Tip #3: Warmth

Babies like the warmth. It's soothing and comfortable. If you want to get those cute bare bum pictures then you need the room to be warm. I used a small space heater and set the temp at 77 degrees. This was really warm for my sister and I who were in tanks and shorts but great for Mason when he was baring it all for the pictures. Also, you might consider wrapping (Tip #4) your baby in between pictures sets to make sure they don't get chilled. Lastly, have a hair dryer on hand. We used it occasionally when we noticed him moving and stretching a little bit plus it provides some white noise which can be really comforting to newborns (Tip #5).

Tip #4: Start with Swaddling

This tip is not something I did but I wish I had! I thought the bare bum shots were adorable so I jumped right into them. I should have started by swaddling him in some cute fabrics (cheesecloth is pretty cute). This is a good way to ease him into the session. Babies like to be swaddled anyway so he or she will likely appreciate the warmth and comfort and may even give you a smile or too.

Tip #5: Noise

In the first couple of weeks Mason really liked white noise. It was soothing to him so we kept the hair dryer on hand and I downloaded a white noise app on my phone which was really helpful. (It's called Relax and Sleep.. pretty cool because you can choose lots of different sounds. Mason liked the heartbeat and the summer rain combination. :))

Tip #6: Cheap Props

Before Mason was born I searched the internet for props. These are also overpriced! Who pays $10-15 for a knit cap or a blanket which was basically just cut fabric? I ended up finding great deals on eBay. I bought a knit dinosaur cap, angel wings, and an owl cap (which ended up being huge because I guess newborns in China have really large heads). So I spent $20 for all of those items and then I found a children's tie at Goodwill for $2 and some glasses for $1. I also bought a faux rabbit fur at Hobby Lobby (with a 40% off coupon) for $6. In total I spent less than $30 for all the props and didn't have any other expenses because I had everything else (blankets, fabric, books, baskets, our wedding rings, etc). There are a ton of cute props out there or things you can use at home like your favorite pearl necklace for a baby girl. :)


I hope all of these tips help and get you the best newborn pictures! Let me know if you test it out and how it works.... or if you have any tips of your own.

<- Kassy ->

10.15.2012

DIY: Dining Chair Overhaul

A couple weeks back I finally found a new dining table. Well it's new for us but it's actually over 100 years old! The table is a stellar piece but it didn't come with any chairs. The amazing thing is that when I went to pick it up (found it on Craigslist) the lady who was selling everything and moving also gave me a set of four chairs, two other chairs, and a bench since she needed to get rid of them! Lucky find! :) So these chairs, they were in pretty bad shape because they were also over 100 years old and were not taken care of... they are so old the cushion was stuffed with straw! Crazy that they used to use straw before they could pick up cotton batting or foam.


Anyhow, we thought that with an old table in a mahogany tone that we could modernize the look by painting the chairs black. A quick trip to the hardware store to figure out what we should do and we quickly decided on a black lacquer. So here's the list of all the supplies:

- Black Lacquer Spray Paint (Krylon)
- 2" Foam
- Faux Leather material for the cushion
- 3/4" Plywood
- Screws
- Heavy Duty Stapler which we borrowed!
- Felt Pads for the bottom of the legs so they wouldn't scratch our floor

Step 1: Preparation
For this project we measured the chair frame to figure out how big the cushion should be. These chairs have sort of a trapezoid shape and we made the end opposite the back of the chair about an inch longer to make it a little bigger and to make sure it wasn't short of the chair frame. My husband cut the plywood and I used that as a pattern to cut the foam and fabric. I cut the foam the same size and the fabric an extra 3" on each end.

Step 2: Staple!
I laid the faux leather, good side down. Next I laid the foam and then the plywood on last. We pulled the fabric tight, pulling the foam into the plywood. Then we stapled the fabric to the bottom of the plywood and trimmed the extra fabric.


Step 3: Paint
This takes a bit but it's worthwhile to paint a number of coats. We painted about six coats because we didn't want to sand each chair. We just primed and painted a lot! Be careful not to spray too close as you might get drips/clumps. A nice even spray and some patience to do multiple coats for coverage is key! Also, if you are going to do a big project like this then invest in a $5 sprayer so you don't kill your hand.


Step 4: Attach the Cushion
Next we used four screws four each chair to attach it at the corners of the cushion to the corners of the chair frame. And lastly we put felt pads on the bottom of each leg.


Didn't these turn out great?! I love them and I love that they were so cheap because I looked at dining chairs and they weren't cheap! Now we just need to find six more to fit our table when we put all four leaves in it!

Here's the budget breakdown:
- Plywood: Left over from our headboard project! Love using all the scraps!
- Faux Leather: $16 - I happened to find some on clearance... it was $8 per yard and two yards was perfect. This is normally $30 per yard!
- Foam: $29 - I bought a twin 2" foam mattress topper from Walmart for $29... a serious steal considering the craft store would have sold me the same size for upwards of $80!I also have some foam leftover... looking for a good project for the scrap. :)
- Spray Paint: $25 - 5 cans for about $5 each
TOTAL: $70 for all four chairs! Unbelievable... dining chairs usually go for more than $70 each and don't have as much character or good structure. These are solid chairs.

So.... What do you think? Does the black lacquer look work?


<- Kassy ->

PS - See that basket on the table? I made that for $6! And a matching vase for $2... Tune in over the next few weeks for that DIY post!

8.11.2012

DIY: Lighthouse Lamp

Hi :)

I am posting this without many details and/or instructions because I can't take the credit but I think it's a great DIY and definitely wanted to share it! For our nursery we wanted a cute lamp but nautical, rope, or driftwood lamps are ridiculously expensive to buy... prices ranging from $75-200! (Keep in mind I'm a cheapskate... uhhh I mean thrifty?)

So here's what we started with and then ended with:


The lighthouse was a decorative accessory at Hobby Lobby but the top knob was broken off... light bulb! This was perfect to retrofit for a light. Plus because it was broken I got it for 60% off ($10)!

This is basically where my skills and contribution stopped haha. I passed this item over to my father-in-law, Rick, and he pretty much did the rest! He added a wood base to weight the lighthouse since it was really light and would easy fall over when turning the light on or when you put the shade on top. He added a light bulb using a light kit with the wiring that came from the wood base. Lastly, he added a color changing light on the inside too. :) A neat little night light with a separate switch. I know I'm making this sound really simple and that it actually took some time and energy to put it together!

You can't tell but the lamp shade looks like a burlap (but not rough at all) and has a navy rope border on the top and bottom. It works great!

All in all here's about what you would spend on making a similar lamp:
- $10 decorative base
- $11 for a lamp kit (purchase at the hardware store)
- $10 shade (or you can find them at thrift stores for about $4 but we were looking for something in particular)
- scrap wood (find it for free on craigslist if you don't have it already)
- optional: color changing lights and I don't know how much these are or where you find them :)

For $25-30 you can create your own lamp and it's something you can be proud of! I didn't do the work but it's special that our son's grandpa made it. :) And it's something I can do in the future.

How can you get creative to save even more? A DIY base too?! If you have any ideas then please share!

-> Kassy <-

8.05.2012

Builder Grade to Beautiful: Faux Wallpaper

I've been dying to do this project since I saw it on Pinterest a few times... and I finally got my husband to agree and help me out a little. It's a little tough doing projects when you're 8 1/2 months pregnant so I'm enlisting his help more and more these days. :)

So back to focus on the production.... I don't like wallpaper. haha. I have such a hard time hanging it so there are no bubbles, the lines match up, and really so it looks good for a long period of time. PLUS, it's expensive! I've only done it once and won't do it again. It was a major pain and for a small 9' x 9' room it cost about $200 (yuck) AND it took my husband and I at least 5 hours to hang because we're no pros!

.... with all these reasons not to do wallpaper there is one really good reason to do it.... It can be so beautiful and transform a room! That's tempting.

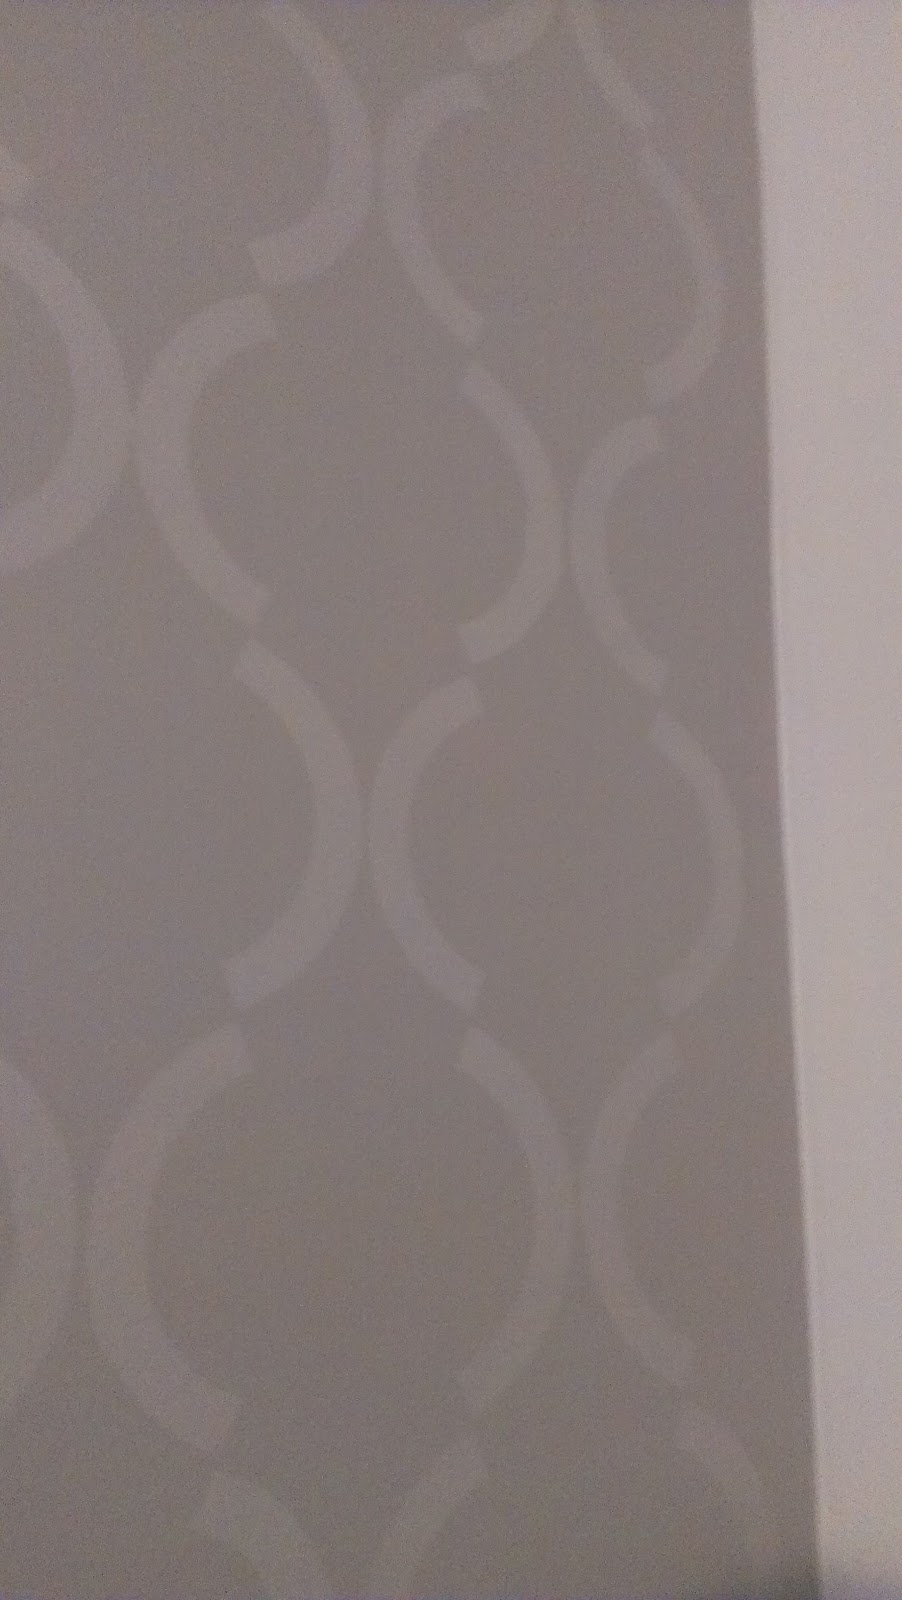
So what to do instead? the look of wallpaper without the hassle (or at least most of the hassle). I'm not saying this project is necessarily easy but it's not too hard and the main reason I loved it... I made a million mistakes and can you tell by looking at this picture??? Nope. :)


Hooray for that because I'm not an expert stenciler... yup we used a stencil to make it look like wallpaper!

One thing that is always important to me... budget. So this project actually works out nice because it is much more budget friendly than wallpaper.

Supplies:
- Paint (we used a hi-gloss paint in the same color as the wall for a subtle look) for one wall a quart is sufficient - $9 **I recommend about half the paint you would normally need for a full wall is necessary for stenciling**
- Stencil - $30 (used a coupon code on cuttingedgestencil.com)
- Small paint roller & tray - $2
- Blue tape (we always have a roll of this on hand but it's about $4 per roll)
- A roll of paper towels - $.8
- Ladder
- Bubble level (a must have)
- Patience :) It takes a little bit of time!


Here are the steps to get the look of wallpaper without the hassle!

Step 1: Prepping the space
Tape off the ceiling, base trim, sides of the wall (if you're only doing one wall) otherwise you will have touch-up to do after!

Step 2: Pick a starting position
We started in the center of the wall because it's visually pleasing and will end the same way on both sides. We also started at the ceiling. We realized pretty quickly that the corners/transition to ceiling were tough so we skipped it at first and came back when we were comfortable with the stenciling. You can jump right into it if you're already comfortable.


Make sure you use your level for your first stencil... this is SO IMPORTANT!!! I can't stress enough how important it is to start off right.

Step 3: Repeat the stencil... over and over... and over again!
You can use a repositioning adhesive spray but the blue tape we had on hand worked great. Use your level too!!! I checked every piece.
This is where you need patience. It takes awhile! But believe me the end result is worth it. Try to enlist some help or at least someone to keep you company. [Thanks to my lovely friend, Leah, for stopping by and helping/chatting while doing this project]


*Tip: I rolled the roller in the paint and then rolled it on paper towels once/twice to get rid of excess and ensure it was even. I would highly recommend this. When I would forget to roll it on the paper towel (baby brain!!) it would be globby (nope, don't think that's a word).  Luckily like I mentioned earlier... you can't tell BUT it's better to at least try to make it look smooth. This is definitely going to use more paint.. and lots of paper towels but it's worth it when you have a good result.

Step 4: Complete the edges
This is tedious and more difficult than the rest of the wall so my husband helped me. It's difficult to get all the way to the edge if it's in the middle of the stencil (see picture below of the stencil at the base trim) BUT that's why you start at the top... no one is going to be looking at the floor! They won't even notice. We got as close as possible and called it a day. We really didn't stress about perfection and the results were still outstanding. For the sides, in the corner, the pattern ended perfectly (probably purely luck because we didn't plan for this) but we sort of stopped it too. Meaning I could have continued with a small portion that was still left on the stencil but I stopped at the last whole piece and called it a day (see other picture below).


Step 5: Admire your work!! :)
I am really impressed with the results because it was fairly simple (though it took a lot of time) and pretty inexpensive! My husband was teasing me because he was wondering how many other walls I was going to try to do with this same type of project. He knows me too well!

Stay tuned because we're planning some DIY projects to add a little something extra to our master bedroom now that we have an awesome accent wall. All assuming my little boy doesn't decide to make an appearance too early!


So what walls do you want to try the faux wallpaper on??? I know you want to give it a try in your own house. :)

-> Kassy <-


7.30.2012

DIY: Mobile


Hello again! :)

This next project (like many over the last few months) are in preparation for our baby boy! It was a fun, easy, and inexpensive project. Depending on a theme you have chosen for your nursery you can do this too! I created a mobile for the nursery that went with the theme (nautical) using sailboats and twine/rope. I have some steps and tips to create your own.

Step 1: Gather Supplies...
This project was good for the budget because I could use a lot of inexpensive material. Since the objects (sailboats) are small I used scrap fabric. Whenever I go to the craft stores I check the remnants section for good pieces that I can use for small projects. I got all this material for about $8! That's really stinkin good considering I have leftover material too! :) You'll see random appearances in later projects I'm sure.

So in total my materials list was:
Fabric - $8 (JoAnns)
1 wooden dowel - $.25 (Wal-Mart)
Twine/rope - $2 (JoAnns)
I had batting from random pillow projects already so that was a money saver for sure!
Buttons (to add some fun details... clearance and some I had already) - $4.50
Glue which I had on hand too but I think it's just $2-3 for a small tube of this heavy duty stuff.
Wood beads to add some detail... I wasn't happy about only finding this big container but I'll hold on to them for other projects - $3.50 (Wal-Mart)

So check out what 3-4 hours and about $20 gets you.....


Step 2: Sewing!!
Before I cut the sailboats I made a mini template out of some cardboard so that they were all about the same size. Cut all four sailboats and the star in the middle (two of each item). I hand stitched these because it creates a different look than with a sewing machine so anyone can definitely do this at home!

One thing I kept forgetting was to sew in the twine/rope... I would have pull out my stitches which was a pain so don't forget that you have to hang them somehow and it's better to incorporate the rope and/or string into the item instead of trying to attach it later! (Looks better and is easier). When I got to the end of each item I stuffed them with batting and then finished out the stitch.

Also, I quickly attached the buttons to each boat after they were all sewn together to add a little something extra.  (see picture below?!)


Step 3: Attach to dowel
I had help from my husband with this part. He cut the dowel in half with his saw (to make sure it was even and pretty) but you can cut these with bolt cutters too. He also notched groves in the middle of each so they would cross each other nicely. I use glue to adhere them and wrapped the with the twine/rope from the star to make sure they stayed put. After that dried I attached each boat to the ends of the dowels using the twine/rope that I sewed into them and used glue to make sure they stayed in place. The rope was long enough that after I wrapped it around the dowel and tied it in a knot I pulled it up to the center where I tied all the pieces together. If you want the mobile to sit level you have to make sure the strings from the dowel to the center point are the same length otherwise it will hang lopsided!

Step 4: Hang!
I used a hook to hang it from the ceiling and that worked perfect (it didn't weigh much so there are lots of other options to hang it too but just in case it gets yanked a few times). My husband installed the hook to make sure it wasn't coming out (following the directions :)) and then we tied the mobile to the hook.

And that's it!! It was really an easy project and I think it adds something nice to the room. :) We hung it above the changing table to keep our boy distracted while we change him but you can also hang it above the crib though it's more likely to get yanked there so make sure it's sturdy/durable!


Anyone interested in trying something similar? Let me know! I love to hear about different projects. :)

-> Kassy <-

7.24.2012

DIY: Gutter Bookshelves

I saw the most amazing idea on Raising Olives Blog and wanted to do the same thing in our baby's room. I think books, reading, learning and all things education related start at the beginning so I've made sure this is already a focus for our little boy. For my showers I asked that in lieu of a card the guests bring a book and to make it special they should write something to our baby inside the cover. :) It was a great success and I'm so thankful for the wonderful collection we have to share with our boy! Since we have a little library, storage for these books is key. I want them to be accessible for me when I'm rocking him to sleep in the first years and then accessible for him when he wants to read himself. Soooo... these gutter bookshelves are perfect! Plus I love DIYs. :D

The plan for the shelves was to hang them inside the existing wood trim boxes on the wall next to the rocker. There are three boxes and they are a little over 2' wide by 3.5' tall. This means we can fit three 2' shelves in each box... that's nine shelves (I get an A+ in math for today :)).

Here's the supply list:

- Vinyl gutters which generally come in 10' pieces (only get aluminum if you have a cut wheel and/or a saw with a carbide teeth blade and even then safety is a big factor so be sure to have all the right protective gear)

- End caps which come in right and left

- Outdoor adhesive

- Caulk - Clear drying caulk

- Screws with anchors OR you can use brackets (purchased at the hardware store as well)

And that's it!

We picked up materials at a chain hardware store. We grabbed two pieces of 10' gutters which will give us five shelves each so we'll have one extra in case we need it. I let my husband cut the gutters on his table saw (or maybe he wouldn't let me cut them... he always thinks I will lose a finger or something haha) and I cleaned them up.


One thing I recommend, because I have pets that shed, is to rub the shelves with dryer sheets. I use dryer sheets on my baseboards too and it helps to keep the hair and dirt off of them! Once they are clean you can glue the end caps to each shelf. My husband glued and I caulked.
 

Once they were dry (we let them dry over night but it doesn't take long... a few hours) we hung them. Use a level... I never hang anything without a level and try to hit studs if you can just to ensure they won't fall when our little boy yanks on them to stand up :)

 
For less than $100 we created a "library" in our nursery! Note: this is really inexpensive if you have fewer longer shelves (we had to work around the trim so we had more shelves) because the end caps are the expensive part!


How do you display your books? Any other creative ideas out there? I want to hear about them!

-> Kassy <-