I've been dying to do this project since I saw it on Pinterest a few times... and I finally got my husband to agree and help me out a little. It's a little tough doing projects when you're 8 1/2 months pregnant so I'm enlisting his help more and more these days. :)
So back to focus on the production.... I don't like wallpaper. haha. I have such a hard time hanging it so there are no bubbles, the lines match up, and really so it looks good for a long period of time. PLUS, it's expensive! I've only done it once and won't do it again. It was a major pain and for a small 9' x 9' room it cost about $200 (yuck) AND it took my husband and I at least 5 hours to hang because we're no pros!
.... with all these reasons not to do wallpaper there is one really good reason to do it.... It can be so beautiful and transform a room! That's tempting.
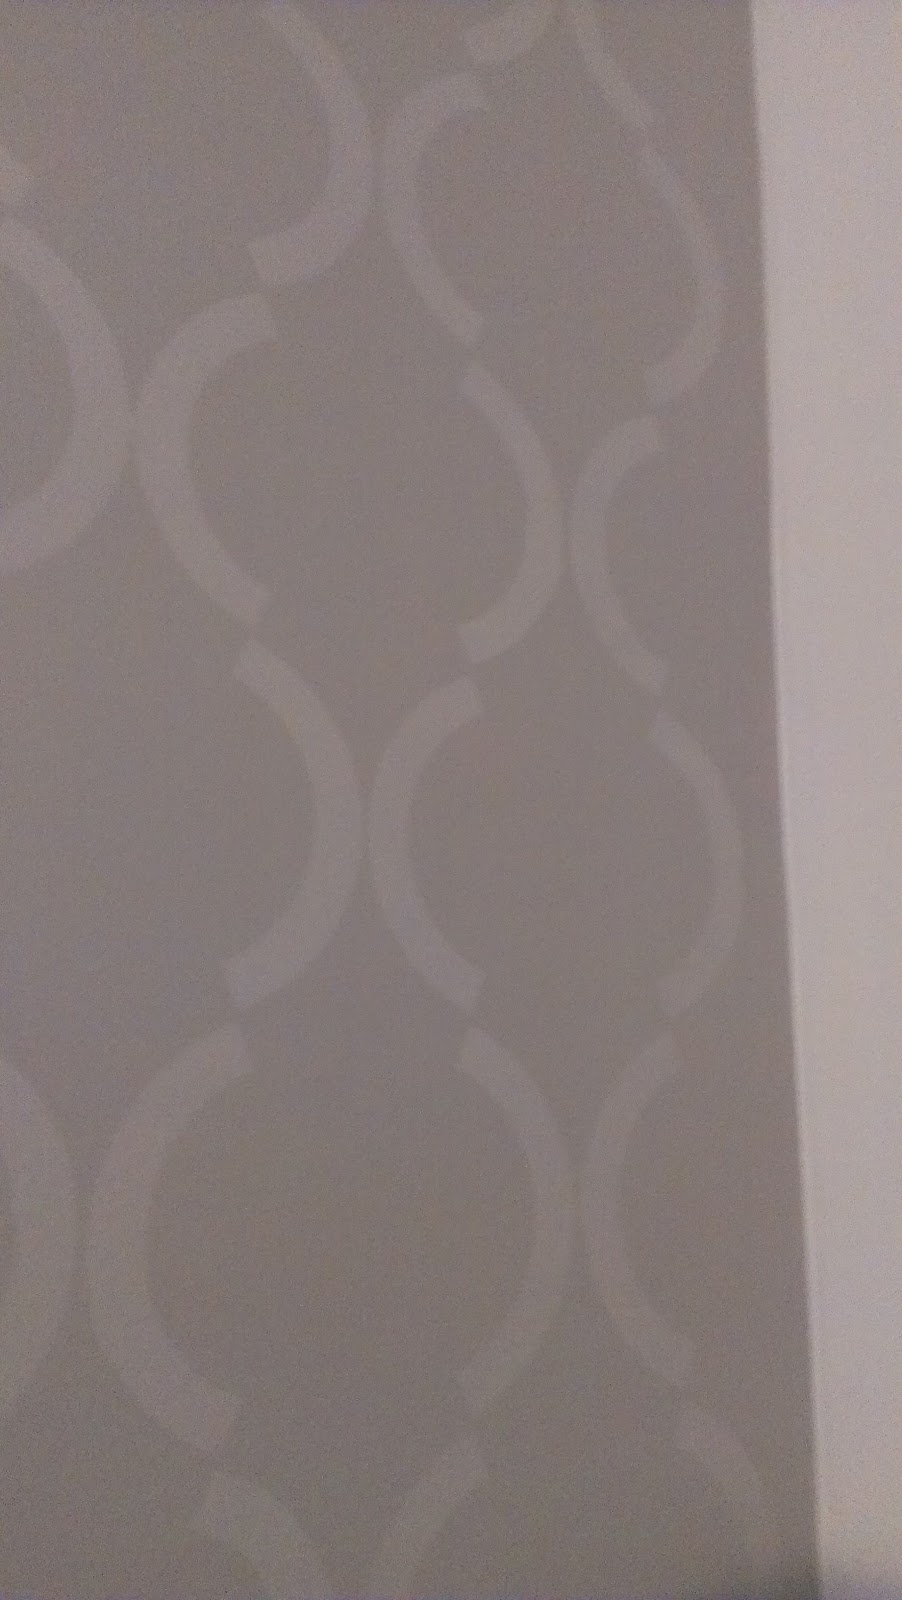
So what to do instead? the look of wallpaper without the hassle (or at least most of the hassle). I'm not saying this project is necessarily easy but it's not too hard and the main reason I loved it... I made a million mistakes and can you tell by looking at this picture??? Nope. :)
Hooray for that because I'm not an expert stenciler... yup we used a stencil to make it look like wallpaper!
One thing that is always important to me... budget. So this project actually works out nice because it is much more budget friendly than wallpaper.
Supplies:
- Paint (we used a hi-gloss paint in the same color as the wall for a subtle look) for one wall a quart is sufficient - $9 **I recommend about half the paint you would normally need for a full wall is necessary for stenciling**
- Stencil - $30 (used a coupon code on cuttingedgestencil.com)
- Small paint roller & tray - $2
- Blue tape (we always have a roll of this on hand but it's about $4 per roll)
- A roll of paper towels - $.8
- Ladder
- Bubble level (a must have)
- Patience :) It takes a little bit of time!
Here are the steps to get the look of wallpaper without the hassle!
Step 1: Prepping the space
Tape off the ceiling, base trim, sides of the wall (if you're only doing one wall) otherwise you will have touch-up to do after!
Step 2: Pick a starting position
We started in the center of the wall because it's visually pleasing and will end the same way on both sides. We also started at the ceiling. We realized pretty quickly that the corners/transition to ceiling were tough so we skipped it at first and came back when we were comfortable with the stenciling. You can jump right into it if you're already comfortable.
Make sure you use your level for your first stencil... this is SO IMPORTANT!!! I can't stress enough how important it is to start off right.
Step 3: Repeat the stencil... over and over... and over again!
You can use a repositioning adhesive spray but the blue tape we had on hand worked great. Use your level too!!! I checked every piece.
This is where you need patience. It takes awhile! But believe me the end result is worth it. Try to enlist some help or at least someone to keep you company. [Thanks to my lovely friend, Leah, for stopping by and helping/chatting while doing this project]
*Tip: I rolled the roller in the paint and then rolled it on paper towels once/twice to get rid of excess and ensure it was even. I would highly recommend this. When I would forget to roll it on the paper towel (baby brain!!) it would be globby (nope, don't think that's a word). Luckily like I mentioned earlier... you can't tell BUT it's better to at least try to make it look smooth. This is definitely going to use more paint.. and lots of paper towels but it's worth it when you have a good result.
Step 4: Complete the edges
This is tedious and more difficult than the rest of the wall so my husband helped me. It's difficult to get all the way to the edge if it's in the middle of the stencil (see picture below of the stencil at the base trim) BUT that's why you start at the top... no one is going to be looking at the floor! They won't even notice. We got as close as possible and called it a day. We really didn't stress about perfection and the results were still outstanding. For the sides, in the corner, the pattern ended perfectly (probably purely luck because we didn't plan for this) but we sort of stopped it too. Meaning I could have continued with a small portion that was still left on the stencil but I stopped at the last whole piece and called it a day (see other picture below).
Step 5: Admire your work!! :)
I am really impressed with the results because it was fairly simple (though it took a lot of time) and pretty inexpensive! My husband was teasing me because he was wondering how many other walls I was going to try to do with this same type of project. He knows me too well!
Stay tuned because we're planning some DIY projects to add a little something extra to our master bedroom now that we have an awesome accent wall. All assuming my little boy doesn't decide to make an appearance too early!
So what walls do you want to try the faux wallpaper on??? I know you want to give it a try in your own house. :)
-> Kassy <-