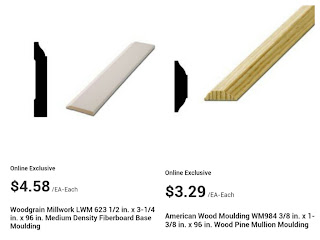
Back in April/May we replaced our carpet in the living room and office because I accidentally spilled paint all over our living room carpet. We searched for a durable wood/laminate floor and settled on an inexpensive, light commercial laminate flooring that would last many years with our dogs and little one(s). I am very pleased with it! When we put the flooring in we left the regular old baseboards and built on it to make it more substantial. We checked out large baseboards but they were pretty expensive so using a couple other pieces to layer we can create a similar look but not as expensive. Additionally, it's more unique! We bought the same baseboards and wood mullion trim. I have pictures below from the Home Depot website (that's where we bought the trim) so you know what we used.
We ripped the same baseboard pieces in half and put them in front of the existing baseboard which covered the gap from the new floor. This was used instead of quarter round. The mullion was placed about an inch about the top of the existing baseboard which is pictured below (top right).
Since the bottom, ripped baseboard piece was deeper than the door trim my husband cut a small wedge to finish off the edge a little nicer than leaving a cut edge (pictured top left). When all the trim was up we filled the nail holes, sanded, and painted the trim including the wall space in between the existing baseboard and the mullion.
It looks pretty good with the new floors and the freshly painted (same paint I accidentally spilled on the carpet) doors, right?! The doors will be featured in an upcoming post. :)
<-Kassy->


No comments:
Post a Comment